Geologyhound
Well-known member
I know cleaning/not cleaning and method of cleaning may be controversial. I do not post this with the intention of discussing whether or not to clean, nor the merits of any particular method. I simply wish to show some results.
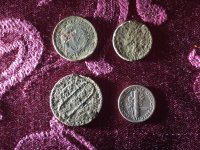
I recently found some old coins and a token. The Indian head penny was so badly crusted that some faint relief was visible where the date should be. The head was barely visible. The token had the number five visible on one side and nothing was legible on the other side. As such, I considered them essentially worthless unless more details could be seen.
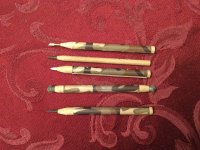
For this reason, I obtained a set of the Andre’s cleaning crayons from an Internet vendor. I got the set with five tools – one white fiberglass, two black (hard and soft), one scraper, one steel wool. My basic take on this set is the white is coarse, the blacks are medium and fine, and the steel wool is clean up. I did not use the scraper. I probably spent at least two hours on the three items I cleaned.
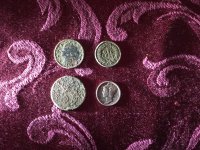
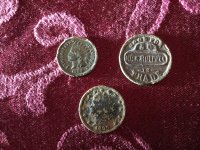
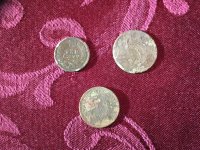
Before and after pictures are attached. The mercury dime was not cleaned at all, I just don’t have any other before pictures. I didn’t really do much with the V nickel other than clean up around the stars. However, I think the difference on the Indian head penny and the token is night and day. Not only is the date clearly visible on the penny, but so is liberty on the headband. The token is now clearly identifiable. My previous oldest coin was 1882. So, I am especially pleased that this “new“ penny is now my oldest coin!
In hindsight, I think my biggest mistake was trying to clean them up too much right after I got home. Even with a soft bristle toothbrush, I lost part of the rim by scrubbing too hard. In the future, I think I may gently remove what dirt is loose and let the rest dry and harden before attempting to clean.
I can post more about how I proceeded if anyone is interested.
I recently found some old coins and a token. The Indian head penny was so badly crusted that some faint relief was visible where the date should be. The head was barely visible. The token had the number five visible on one side and nothing was legible on the other side. As such, I considered them essentially worthless unless more details could be seen.
For this reason, I obtained a set of the Andre’s cleaning crayons from an Internet vendor. I got the set with five tools – one white fiberglass, two black (hard and soft), one scraper, one steel wool. My basic take on this set is the white is coarse, the blacks are medium and fine, and the steel wool is clean up. I did not use the scraper. I probably spent at least two hours on the three items I cleaned.
Before and after pictures are attached. The mercury dime was not cleaned at all, I just don’t have any other before pictures. I didn’t really do much with the V nickel other than clean up around the stars. However, I think the difference on the Indian head penny and the token is night and day. Not only is the date clearly visible on the penny, but so is liberty on the headband. The token is now clearly identifiable. My previous oldest coin was 1882. So, I am especially pleased that this “new“ penny is now my oldest coin!
In hindsight, I think my biggest mistake was trying to clean them up too much right after I got home. Even with a soft bristle toothbrush, I lost part of the rim by scrubbing too hard. In the future, I think I may gently remove what dirt is loose and let the rest dry and harden before attempting to clean.
I can post more about how I proceeded if anyone is interested.